“The best way to get rid of bats is through exclusion techniques that ensure their safe removal while protecting your home.”
Getting rid of bats requires a humane approach that ensures their safety while protecting your home. Bats play an essential role in the ecosystem, so exclusion techniques are the most effective and ethical way to remove them.
These methods allow bats to leave naturally without causing harm, and they prevent future re-entry. By understanding bat behavior and using professional removal strategies, you can solve the problem efficiently without violating wildlife regulations.
Understanding Bat Behavior
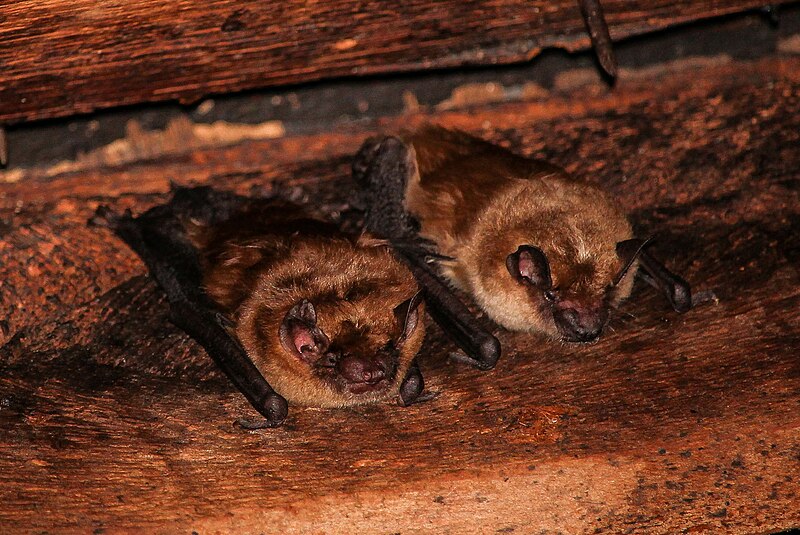
Bats are nocturnal creatures that rely on dark, quiet spaces to rest during the day, making attics, garages, and eaves ideal spots for them to settle. They often enter homes through small gaps or cracks in walls, roofs, or vents, as they can squeeze through openings as tiny as half an inch. Once inside, bats typically look for secluded areas that provide warmth and protection, such as rafters and unused spaces. Their ability to find these entry points quickly makes it essential to monitor your home for signs of bat activity.
Another key factor in bat behavior is their migratory patterns. Many species of bats return to the same roosting spot year after year, making it more difficult to keep them away once they’ve found a favorable location. They are also highly social animals, often roosting in colonies that can grow over time. This is why bat removal should be handled swiftly and effectively to avoid larger infestations, especially during breeding seasons.
Finally, bats are natural insect predators, feeding primarily on mosquitoes and other small bugs. While this makes them beneficial for the environment, it can also attract them to homes where insect populations are high. Understanding this feeding behavior can help in implementing preventative measures, like reducing insect activity around your home, as part of a comprehensive bat removal strategy.
Related: Why is bat removal so expensive?
Exclusion Steps
Using exclusion technique to get rid of bats requires expertise and careful planning – here’s how it usually go when we are getting rid of a bat infestation:
Step 1: Identifying Entry Points
Before starting any exclusion process, the first and most crucial step is to identify where the bats are entering and exiting your home. Bats are small and agile, allowing them to fit through gaps as tiny as half an inch. To spot these entry points, it’s best to observe the exterior of your house during the evening when bats are most active, flying in and out of their roost. Common entry locations include vents, gaps around chimneys, soffits, and even loose tiles or siding.
Once you’ve identified these openings, it’s essential not to seal them immediately. Bats must be excluded humanely, meaning they need to leave voluntarily before you close off their access points. Sealing these gaps too early could trap bats inside, leading to potential health risks, as well as legal issues since some bat species are protected by law. Take careful note of every possible entry and exit to plan the next steps in the exclusion process.
Step 2: Installing One-Way Exclusion Devices
After pinpointing the bats’ entry points, it’s time to install one-way exclusion devices, which are designed to allow bats to leave but prevent them from returning. These devices are often tubes or nets that create an exit path without blocking the way out. When the bats fly out at night to hunt, they’ll be unable to re-enter, encouraging them to find a new roost outside your home. One-way doors are a humane method for ensuring that all bats are safely removed.
It’s important to leave the exclusion devices in place for at least several nights, as some bats may not leave immediately. Timing is also critical; exclusion should not be done during maternity seasons when young bats, unable to fly, may be left behind. This step requires patience and diligence, but it’s essential for ensuring the bats vacate your home without harm.
Step 3: Sealing Entry Points
Once you’ve confirmed that all bats have left through the exclusion devices, the final step is sealing the entry points permanently. This involves using materials like caulk, mesh, or flashing to cover the holes or gaps where bats were entering. It’s essential to use durable, weather-resistant materials that will hold up over time, especially since bats may attempt to return to their former roost.
In addition to sealing the specific entry points, you should inspect other potential weak spots around your home, as bats can easily find new routes if the original entry is blocked. Taking preventive measures such as reinforcing vents or adding chimney caps can also deter future bat activity. Proper sealing is the key to long-term bat exclusion, ensuring that your home remains bat-free after removal.
Inspecting Entry Points
Inspecting your home for potential bat entry points is a critical part of the removal process. Start by focusing on areas that are easily accessible to bats, such as rooflines, vents, and soffits. Even the smallest gaps, cracks, or openings around windows, chimneys, or attic vents can serve as entryways for bats. It’s recommended to conduct this inspection during daylight hours when the bats are less active, allowing you to safely explore their potential access points.
Another key aspect of the inspection is looking for signs of bat activity. Common indicators include bat droppings (guano), staining around entry holes, and audible chirping or squeaking noises from inside walls or attics. These clues can help you determine where bats are roosting and how they are moving in and out of your home. If you’re unsure or cannot locate the exact entry point, hiring a professional to conduct a thorough inspection can ensure nothing is missed.
Once the entry points are identified, it’s important to create a clear plan for addressing each one after the exclusion devices are installed. Closing all access points after the bats have left is crucial to prevent them from returning. Properly inspecting and sealing every possible entry will save you from future infestations and will be a vital step toward making your home bat-proof.
Professional vs. DIY Removal
When it comes to bat removal, deciding between professional services and a do-it-yourself (DIY) approach can be challenging. Many homeowners are tempted to handle the process on their own, thinking it will save time and money. However, bat removal is not as simple as it may seem. The legal protections for bats, combined with the potential health risks, make DIY removal a risky option for most people. A small mistake in sealing entry points or mishandling bats can lead to recurring issues or even fines for violating wildlife protection laws.
Professional bat removal services, on the other hand, bring expertise and specialized tools that ensure the process is done correctly and humanely. Licensed professionals are trained to perform thorough inspections, identify the exact species, and follow legal guidelines for safe bat exclusion. They also have experience in handling difficult situations, such as large colonies or hidden roosts, that would be nearly impossible for a homeowner to address alone. While professional services may come with higher upfront costs, the long-term benefits, such as peace of mind and guaranteed removal, often outweigh the expense.
In addition to the removal itself, professionals provide post-removal services, including cleanup of bat guano and repairs to entry points. Bat guano can pose serious health risks, such as histoplasmosis, and proper cleaning requires specialized equipment. A professional removal service will handle these details, ensuring that your home is not only bat-free but also safe from any contamination left behind. Ultimately, while DIY removal may seem like a cheaper option, the expertise and thoroughness of a professional service often prove to be the better investment.
Preventative Measures Post-Removal
Once the bats have been safely removed from your home, taking preventative measures is crucial to ensuring they don’t return. The first and most important step is to seal all entry points identified during the removal process. Even small gaps around rooflines, chimneys, and vents need to be sealed with durable materials such as caulk or metal mesh. It’s also a good idea to install chimney caps and attic vent covers, which prevent not only bats but other pests from entering your home.
In addition to sealing entry points, regular home maintenance plays a key role in bat prevention. Inspecting your roof and exterior walls for wear and tear is essential, as bats can exploit any new gaps that form over time. Keeping your attic well-lit and ventilated can also make the space less appealing to bats, who prefer dark and quiet areas for roosting. Trimming back trees or branches that hang close to your house is another useful step, as bats often use these as landing spots before entering homes.
Finally, it’s important to address the surrounding environment that may attract bats in the first place. Reducing insect populations around your home by using bug lights or eliminating standing water sources can help, as bats are drawn to areas with abundant food. Proper waste management, including securing garbage bins and covering compost piles, can also prevent attracting insects that bats feed on. By taking these comprehensive preventative measures, you can significantly lower the chances of a bat infestation reoccurring in the future.


